Thursday, August 28, 2008

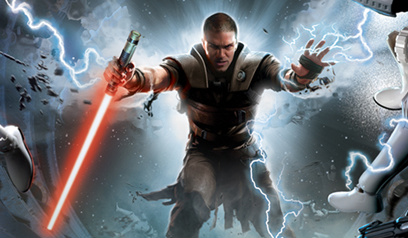
Star Wars: The Force Unleashed Demo Guide


Star Wars: The Force Unleashed Demo Guide (PS3 version)

Star Wars: The Force Unleashed Demo Guide (Xbox 360 version)

Ok, so I actually like The Force Unleashed better than I initially thought. The game actually shares a few similarities to Advent Rising gameplaywise, based off some of the moves presented in the demo and a few other aspects from the trailers that I have seen. If you didn't know, Advent Rising and I were close at one time until the trilogy was basically canned and forgotten.

Anyway, I typed up a full move list for Starkiller based on my findings in the guide. To my surprise, he actually has a parry move that can be used against physical attacks, but I can't find a real good use for it. Surely in the full game, Starkiller will have some sort of saber slash counter or a type of retaliation attack to perform after the parry.

And with that said, Dante and Nero can finally retire to the bottom of the right column. I've kept them there since last March, so they've had their fair share of time in the spotlight.

UPDATE (8/29): Added details about the hidden Clone Helmet easter egg. Big thanks to PerfctWeapon and many GameFAQs users!


--> Hidden Clone Helmet Easter Egg

Location: Outside Walkway - Above the tunnel in the back of the walkway

Before hopping over the gap to the side along the walkway where the TIE fighters swoop by, if you want to see a hidden helmet easter egg, then use force grip to stack up a few crates next to the rooftop of the tunnel at the end of the first walkway then leap up to the rooftop of that tunnel. It is best to stack a cylindrical crate on its side (standing up) then stack another cylindrical crate on top of it or stack two rectangular crates on top of the cylindrical crate. Position them with the left analog then set them down lightly by using the right analog to lower them before letting go. Either way, make sure the crates are stacked right below the rooftop then hop on top of them and double jump to the rooftop. Use the force dash (LB) to help gain some extra air time during the double jump if needed. It is best to attempt this on the easiest mode since the TIE fighters will be swooping by and firing at Starkiller the entire time from the left side.

The helmet will be at the end of the rooftop. It can't be collected. Stare in amazement then drop down and get back to the situation at hand.


UPDATE (9/1): Wow! I am absolutely amazed at some of the responses and extra tips that I am already receiving dealing with this demo guide. Very cool.

Anyway, I added an Experience Bonus section under basics and two alternate ways to get to the helmet and two alternate ways to defeat the AT-ST boss. I also simply renamed the Walker the AT-ST in all areas of my guide. I see that I'm going to have research Star Wars a bit more if I actually do write a full guide for SW: The Force Unleashed, which there's a high chance that I will.

UPDATE (9/8): Added the extra tips as noted in the comments section of this post. Thanks to both anonymous users!

Monday, August 25, 2008

SIREN: Blood Curse Guide


Wow, what a time I have had with this guide! I almost delayed it a few days so I could proofread over it, but I went the extra mile today - spent the entire weekend on it really - and proofread through the entire walkthrough portion. By the time many of you read this, then it should already be up on the gaming sites that I usually post my work up on. But if anybody happens upon this post tonight then here it is:

SIREN: Blood Curse FAQ/Walkthrough by Berserker

SIREN: Blood Curse will definitely stand out as a memorable guide for me in more ways than one. It has been an extremely fun guide to work on and it has actually cost me the most out of any guide that I have done. It almost fell victim to an error with my computer but thankfully it was recovered. If it wasn't for that, I would have probably ended it right then and there. This guide really stands out as a lesson to me to back up my files to something as I work on them, instead of simply relying on my comp.

I'm so glad that I can finally post it up now. If you'll excuse me, I'm going to spend the rest of the night playing Xbox 360 now, so my eyes can quit bleeding from staring at this comp screen so much. >_>

UPDATE (9/3): Added a technique for knocking out the maggot shibito early in Episode 11, Chapter 2 thanks to Cor! One chapter mistake was corrected for an archive item and I found one minor typo while scanning through the guide.

Tuesday, August 19, 2008

Leipzig RE5 trailer

Pick your poison.


IGN video version
Youtube.com version

It's really nothing new aside from a few extra clips that Capcom is teasing us with, all the rest is simply rehashed scenes from other trailers. It is interesting to actually see more of the blonde character however.

...

...fingers crossed for a demo toward the end of this year!

Also, Siren: Blood Curse guide = 80% complete. (3 more chapters + full ASCII work + 1 full proofread = FINISHED!) It'll probably be up sometimes next week.

That is all.

Wednesday, August 13, 2008

Bionic Commando: Rearmed Impressions

So far, I've played about an hour of BC: Rearmed today, and I must say that it is everything that I have been expecting so far. Capcom has been on a roll with WOTB and 1942 and now BC: Rearmed takes the old-school formula to a new level. The game plays almost exactly like the old Bionic Commando only with some very smooth HD graphics and extra enhancements. For a downloadable title, the graphics look incredible! It's nearly just as hard as the original game in some spots but they have lowered the difficulty in some of the levels since I know that the original had more pitfalls than this one.

The bionic arm takes just as much technique to work with much like the original BC. I have this habit of panicking when I go to swing that still leads me to my death a bunch but I think I'm getting the hang of it more this time. This one has an optional tutorial level that teaches you the basics of the game along with some advanced techniques. The overhead encounters play out much like they did before and still provide a good break from the 2-D style platforming.

So far, each stage looks to have its own boss fight. The ones that I have gone through so far require a bit of thought instead of a complete action approach which helps to make each boss fight feel refreshing. I was stumped on the first boss for about 10 minutes until I realized the method in which to beat him. From what I've seen, the dialogue before a boss fight is very well handled - along with the character expressions in the drawings, Spencer's wiseass remarks make the conversations quite entertaining.

I'll probably be blasting my way through this one a bit more later tonight.

For those that want to see it in action, take a look at the IGN Video Review.

Sunday, August 10, 2008

A Small Note on Reviews

I've been thinking this over for a while now, and I think I might just link to any review that I do from now on instead of posting it here. The posts for them really take up too much room.

You can find the links below the set of In-Depth guide links. I mainly review games for The Gamers' Temple, so just about all links will lead to their site. I might still post up my own reviews that I write from enjoyment for this site however.

When it comes to a review, it may seem funny, but I usually don't put that much value into another person's opinion on a game while scanning through one unless I've played the game myself - I'm not saying that I'm on some high horse and that I don't respect opinions but I like to try a game out for myself rather than make up my mind based on a review - so whenever I write a review myself, I try to take the reader on a semi-walkthrough of the game and provide some slight opinions here and there rather than persuade the reader one way or the other. At the end of a review, I lay out my full opinion, but I usually don't tell a person to just avoid a game, since I feel that some gamers might find interest in it, even if I didn't like it.

Alright, the review explanation wasn't really needed, but I decided to throw it out there anyway. Hopefully that made sense.