The Resident Evil 6 demo was released on Tuesday, July 3rd and is available for download now for those that have Dragon's Dogma along with the redemption code to access the Resident Evil 6 demo. The walkthrough portion for this guide was literally done in a day so don't expect much from it at the moment. I'll add several bits of extra info to this guide as the days progress.
Thursday, July 5, 2012
Resident Evil 6 Demo Guide
The Resident Evil 6 demo was released on Tuesday, July 3rd and is available for download now for those that have Dragon's Dogma along with the redemption code to access the Resident Evil 6 demo. The walkthrough portion for this guide was literally done in a day so don't expect much from it at the moment. I'll add several bits of extra info to this guide as the days progress.
Labels:
Chris Redfield,
FAQ,
guide,
RE6,
Resident Evil 6,
walkthrough
Sunday, July 1, 2012
Monday, June 25, 2012
Resident Evil 6 - E3 2012 gameplay videos
I didn't get around to posting any of this the week of E3 since I've been busy with many things. Here is a list of many videos for the gameplay segments of each character for the RE6 E3 2012 demo.
Thanks to Seitengrate for the links to some of these videos!
Leon Gameplay
Chris Gameplay
Jake Gameplay
Thanks to Seitengrate for the links to some of these videos!
Leon Gameplay
Chris Gameplay
Jake Gameplay
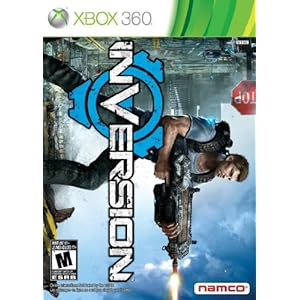
Inversion review
Original review link
Player(s): 1
Extra Features: Online Coop (2 players), Online Multiplayer (2-12 players), Leaderboards
Inversion is a cover-based third person shooter developed by Saber Interactive and published by Namco Bandai games. The game features shooter gameplay very similar to Gears of War and tries to distinguish itself with an added control of gravity to manipulate objects and enemies as well as the environment. Your world literally turns upside-down or sideways at times while playing. While the thought of having gravity at your disposal has much promise, Inversion never does truly have any memorable moments that make me think back about using the gravity to my advantage. It never does have any high points throughout its gameplay - the game runs at a constant average from beginning to end.
Inversion follows the story of Davis Russel and his partner Leo Delgado. When Vanguard City is invaded by a group known as the Lutadores, these two cops must work together to find Davis' daughter and save the world. Inversion plays just like the usual cover-based shooter gameplay found in Gears of War from the start. Focus is placed on taking cover to avoid gunfire and returning fire on enemies that blast your character from a distance. The overall shooter gameplay is just as responsive as Gears of War overall and the game has many weapons to choose from.
One very nice part about Inversion is that the game continually gives you access to new weapons as the game progresses. Shotguns, assault rifles, plasma rifles, gatling guns, sniper rifles, rocket launchers, flamethrowers and a few other weapons will be available as you continue to play. The guns all have an overall satisfying feel to them. The shotguns allow a player to mangle each enemy from up close per shot and assault rifles allow a player to blow off heads or mangle an enemy with constant firepower. The overall gore in the game adds a lot to the overall experience of combat with weapons and gravity controls. It's not overly gory, but it's just enough to give a sense of satisfaction per kill.
The alien invaders can control gravity through the power of their gravlink backpacks. Eventually Davis and Leo get a hold of a gravlink and are able to use gravity to their advantage. They upgrade their gravity powers as the game progress. By the end of the game, both characters will have access to low gravity and high gravity powers. Low gravity allows a player to fire a beam that creates a vortex of gravity in the targeted area. All light objects will float in that vortex and a player can grab floating objects and toss them at enemies. Enemies can also be shot with low gravity to make them float out of their cover areas. They can be grabbed and tossed just like an object as well.
High gravity will also be at a player's disposal later in the game. This allows a player to weight down objects and enemies with a shot from the gravlink. A red vortex will weight down all objects and enemies in the targeted area. Against enemies, this acts as a more of a temporary stun to keep them in one place. Against objects, high gravity is mainly used for puzzle solving by weighting down objects. A shield can also be placed around your character by pressing the left bumper button through the use of high gravity.
The environments of the game have many zero gravity areas where a player can float in air and hop over to floating chunks of debris in the zero gravity zone. A player must take cover from attacking enemies in these zero gravity areas by getting behind floating chunks of debris and firing back at the enemies. Objects in the zero gravity zones can be freely grappled and thrown through the use of the gravlink at any time since the objects are already floating.
In some areas, the characters will have to enter a vector shift by stepping into a portal. When this happens, the wall to the side becomes the floor as the two characters are dropped on the wall and their whole world rotates to the change gravity. After the change, everything goes back to normal as if the characters were back on the normal ground. One unique aspect of this is that you'll have to keep an eye on the walls and ceilings for enemies that will be camping out above your character. While this feature is a nice addition, it is used far too little to ever be really noticed much. It's literally only used near the beginning of the game and then a few times toward the end.
All the gravity features sound so great on paper until you realize the way they control. The controls are the worst problem with high and low gravity and zero gravity areas. With high and low gravity, you must constantly push down on the right thumbstick in order to change between the two gravity options. A vortex must always be created with a shot from the gravlink with low gravity before any object or enemy can be snatched. The controls are not near as easy as a game like Psi-Ops with its psi powers. The worst part of the high and low gravity controls are during boss fights or any intense fights where you must react quickly. Having to go through so much button pressing and waiting for gravity shots to kick into gear can lead to frustration in later areas.
Taking cover and moving in the zero gravity areas can be hard due to the controls as well. While jumping from platform to platform, you must target each platform and jump to it. There will be times where your targeting cursor will quickly jump to a distant platform and then your character will slowly leap toward that far away platform and be forced to suffer damage if any enemies are shooting. To move around to the other side of a platform, you must double tap the left analog. Trying to double tap in the way that your character is facing while under heavy firepower can be frustrating when the camera shifts after jumping as new enemies move out and attack.
Inversion's environments are all highly detailed like many other shooters. The gravity effects make debris and other particles float in the air in each vortex. There are a few rooms and buildings early on that can be totally ripped apart with gunfire. Walls will fall and buildings will collapse in many of the early city surroundings. As already mentioned, the gore in the game is quite pleasing as well. You can toss heavy objects at enemies and watch them splatter or perform finishing moves on enemies that are caught in your gravity vortexes.
The game's overall sound is pleasing, especially when it comes to gravity and weapon sound effects. Shotguns carry a big booming noise, which I always enjoy. Voice acting feels very dry and emotionless when it comes to the characters in the game. Inversion's two lead characters feel so very one-dimensional all the way through the game and they never do truly convey much emotion. I honestly never cared for any character in the game because none of them stood out. On top of all of this, the game's story doesn't have any high points. It never did feel climactic at any time. At one point where a major plot event unfolds, the main character's voice acting and dialogue totally ruined the experience. The actual ending had me very unsatisfied as well.
The main story offers online coop play where one player can take control of Leo. The game offers no local play. The online play for campaign has no random search function. You have to know a friend or any other contact that has the game in order to play the main campaign with online coop play. So basically, you can't just freely jump into a game with a random player at any time. The coop campaign game has to be perfectly planned with someone you know or someone you meet online.
The game has 8 online modes as well. It has the standard Deathmatch and Team Deathmatch along with Hourglass, Assault, King of Gravity, Grav Control, Grav Slaughter and Survival. The majority of these modes are all about killing other players by yourself or in a team. Sometimes gravity powers are focused on like in Grav Slaughter and in Grav Control, by gaining kill streaks, players can activate vector changes to change the overall arena - the wall becomes the floor. The Survival mode is one of the better online modes to me since I prefer coop play as opposed to deathmatch. This mode allows four players to team up and battle waves of AI enemies and bosses.
Inversion has some very solid shooter gameplay, but the gravity controls and overall control of just about any added feature other than the shooter gameplay weight it right back down. The gravity controls can help for making battles easier, but overall shooting can get the job done just as well. The actual shooting still takes front seat to all the gravity controls and the gravity features are never truly recognized as much as they could be with easier controls and more areas that need their uses. There are a few puzzles ever now and then that require high gravity and weaker enemies are taken down faster when in groups with high gravity, but other than that, I never even used high gravity often except to rack up kills for the achievement associated with it. The game has many boss fights in it but many of them are repeated at least once. The boss fights are a nice break from the usual gameplay, but the Slave Driver boss fights gets repetitive after the third time of fighting one as the game progresses.
Inversion is not a bad game, but it's literally turned on its side and one side is good and one side is bad. The good does slightly outweigh the bad, but the game feels so average all the time in the campaign mode. If you're a fan of shooters and looking for a decent shooter, Inversion might be a game that you will enjoy, but for everyone else, this game is easily as forgettable as the two lead character's overall outfits and looks - basically, it's just an Average Joe shooter with gravity controls that could have helped it distinguish itself from other shooters... but the controls bring it down too much.
The Good:
+ Great shooter gameplay
+ Gravity powers
+ Many online multiplayer modes
The Bad:
- The controls for gravity features weight down its usefulness
- The overall story and characters are forgettable
- No real high points in campaign
60%
Inversion has some nice shooter gameplay but when it comes to controlling gravity, it's little world is suddenly turned upside-down.
Sunday, May 6, 2012
Resident Evil: Operation Raccoon City Guide
No matter what, I'll always do some type of guide for every console Resident Evil game. Through the good and the bad, I'll write for them all, and that is a promise, so long as I have the spare time to do so.
Resident Evil: Operation Raccoon City is a true mix of good and bad. I think the good outweighs the bad when played in multiplayer though. Honestly, it is not as bad as reviews make it out to be. That still doesn't change the fact that it's a mediocre game overall to me. I often tell friends "It's loads of average fun!", mainly trying to pinpoint that I have fun with it, but I can see that the game is far from perfect. Here is my review for Operation Raccoon City.
But anyway, this guide covers all the USS Wolfpack campaign mission and I'm working on the downloadable Spec Ops (Echo Six) missions as they release. I'll fix up a full item list with all item locations before too long. With the Spec Ops campaign, the item locations probably won't be as detailed as they are in the USS campaign walkthrough, but all the intel will be listed in full detail for all campaigns.
This guide is very rushed and I think it's pretty half-assed compared to what I usually do... mainly from lack of motivation to write much for the game, but at least I can say that I did something for ORC. I can promise you, the RE6 guide will be WAY better than this one.
Saturday, April 14, 2012
Resident Evil 5: The Mercenaries - Lag Shot
What is "Lag Shot" in Resident Evil 5?
Lag shot is a term associated with performing a gunshot the split second right before a melee attack hits a stunned enemy. Basically, a player fires then melees almost simultaneously. This technique can be done with ANY type of weapon - even a rocket launcher. It can be done with any type of melee as well. This technique can actually be used to play Safari Chris much like BSAA Chris (leg stun only) or it can be used to correct the flaw where Safari Chris' straight might not kill when hitting a Majini from behind after a head stun (straight then lag shot + straight) - when using lag shot before the straight, Safari's straight will always kill if the straight hits!
Around the first year of RE5, lag shot was mainly used while playing off host in duo when a player played with lag. Playing with lag makes a lag shot easier to pull off. When playing with any type of lag, the buttons for performing the lag shot do not have to be pressed as fast! Over the years, players have started to perform lag shot more often without lag. The buttons must be pressed almost instantly one right after the other when lag is not present.
In Mercenaries, most players use lag shot to perform a melee kill more quickly on an enemy after an early stun. It is most useful with Chris and Sheva since their frontal leg melees can both hit grounded enemies. Wesker and Jill can both take advantage of lag shot as well, but the melee will not connect as well in most cases since many of their melees will not hit a grounded enemy (besides arm stun).
Lag shot is best performed with a control type where you can control the camera with the right analog/thumbstick. It's good to tilt the camera toward a stunned Majini before firing the shot right before the melee. With Type C and D controls, a player can only tilt the camera up or down with the right analog/thumbstick, which reduces the amount of control for aiming. With Type A lag shot, you really need all the camera control you can get, so Type C's limited camera control would make that lag shot sequence even harder.
What are the flaws of Lag Shot?
Lag shot does include certain flaws that are caused by trying to perform the lag shot itself.
- When a Majini falls down on both knees for a leg stun, the melee will often miss unless the Majini is uphill or your character is RIGHT NEXT to the Majini. In that case, it is best to perform an instant kill melee from behind or shoot the Majini one more time to cause the Majini to fall. To me, this is the worst flaw of lag shot, simply because, if you had damaged the Majini normally, your character could kill the Majini after the stun, but because you are using lag shot, you need that extra gunshot, but can't get it, so... you are losing time by trying a lag shot when a Majini falls on its knees during a leg stun!
- Never aim toward the head when performing the actual lag shot gunshot or you run the risk of getting a critical shortly before the melee. This can be even worse and you might accidentally activate a scripted Cephalo shortly before a melee.
- Sometimes a Majini will stagger backwards from the lag shot if they are shot in the top half and the melee will miss. This happens VERY rarely, but it will happen eventually. Shooting a Majini in the leg instead of the body will sometimes cause them to fall and the melee will miss as well! It's best to aim toward the body.
- With Safari Chris, if you do a lag shot right after a head stun (lag shot + straight), the Majini might fall and roll to the ground and the straight will miss the rolling Majini. The melee can usually be saved through a stomp when this happens, but this can cause a missed combo!
Type B and D Lag Shot
Player: Berserker Kev
NOTE: Safari Chris is normally a head stun character when trying to melee kill with him. His usual melee kill combination is headshot + straight. When played with lag shot like in the video above, he can be played as a leg stun character since all leg stuns can give you a melee kill. Playing Safari Chris as a leg stun character with the help of lag shot reduces the chances for criticals and random Cephalos in stages where they are both common like Missile Area. I use control type B in the video up above.
The method to perform a lag shot with Type B and D is the easiest, so I will explain it first. With Type B and D, get a stun on an enemy then rush up to the enemy and aim then fire and perform the melee DIRECTLY after firing. The melee button must be pressed between the time period where the gun is fired and the bullet actually hits the enemy.
Here is a full explanation of how to perform a melee from a leg stun with Type B or D:
1) Stun an enemy by shooting the enemy in a leg to get a leg stun
2) Rush toward the stunned enemy to where the melee prompt appears while standing near it
3) Aim at a portion of the enemy with the L1/LT button
4) While aiming press the R1/RT button to fire then QUICKLY tap the Square/X button to perform the melee
The actual shot + melee combination has to be performed one tap right after the other. It's much like Tekken where two button taps must be pressed one right after the other very quickly! Sort of like... R1 ~ Square or RT ~ X.
Type A and C Lag Shot
Player: RAGIA-2-RAGI_
NOTE: The player in the video above is a Type A player. Type A lag shot looks no different from Type B lag shot, but, as you can see, he does it a lot less than in my video - aka. lag shot is harder with Type A and C controls.
Type A and C players have a similar method for lag shot, but, since the melee button and the fire button are both the same, the fire button must be held before stepping in front of the enemy and the gunshot must be triggered by aiming with the aim button. Basically, you have to keep in mind that after you hold the fire button then tap the R1/RT button while holding the fire button, your character will shoot!
Here is a full explanation of how to perform a melee from a leg stun with Type A or C:
1) Stun an enemy by shooting the enemy in a leg to get a leg stun
2) Hold down the fire button (Square/X) then rush toward the stunned enemy to where the melee prompt appears while standing near it
3) While the Square/X button is still being held, aim at a portion of the enemy with the right analog (tilt the camera toward the enemy). The MOMENT you press and hold the R1/RT button to aim your weapon, your character will fire.
4) Right after pressing the R1/RT button to fire, release the Square/X button then quickly tap the Square/X button once again to perform the melee
Just like with Type B and D controls, the melee button press must be tapped in between the time the gunshot is fired and when the gunshot actually hits the enemy in order to perform the melee.
NOTE: If you have any problems performing lag shot with either method, try playing in duo and allowing another player to host - play off host. While playing off host, you will get a bit of lag depending on the connection and the lag shot will be much easier to pull off since you will not need to press the fire and melee button as quickly in sequence.
Lag shot is a term associated with performing a gunshot the split second right before a melee attack hits a stunned enemy. Basically, a player fires then melees almost simultaneously. This technique can be done with ANY type of weapon - even a rocket launcher. It can be done with any type of melee as well. This technique can actually be used to play Safari Chris much like BSAA Chris (leg stun only) or it can be used to correct the flaw where Safari Chris' straight might not kill when hitting a Majini from behind after a head stun (straight then lag shot + straight) - when using lag shot before the straight, Safari's straight will always kill if the straight hits!
Around the first year of RE5, lag shot was mainly used while playing off host in duo when a player played with lag. Playing with lag makes a lag shot easier to pull off. When playing with any type of lag, the buttons for performing the lag shot do not have to be pressed as fast! Over the years, players have started to perform lag shot more often without lag. The buttons must be pressed almost instantly one right after the other when lag is not present.
In Mercenaries, most players use lag shot to perform a melee kill more quickly on an enemy after an early stun. It is most useful with Chris and Sheva since their frontal leg melees can both hit grounded enemies. Wesker and Jill can both take advantage of lag shot as well, but the melee will not connect as well in most cases since many of their melees will not hit a grounded enemy (besides arm stun).
Lag shot is best performed with a control type where you can control the camera with the right analog/thumbstick. It's good to tilt the camera toward a stunned Majini before firing the shot right before the melee. With Type C and D controls, a player can only tilt the camera up or down with the right analog/thumbstick, which reduces the amount of control for aiming. With Type A lag shot, you really need all the camera control you can get, so Type C's limited camera control would make that lag shot sequence even harder.
What are the flaws of Lag Shot?
Lag shot does include certain flaws that are caused by trying to perform the lag shot itself.
- When a Majini falls down on both knees for a leg stun, the melee will often miss unless the Majini is uphill or your character is RIGHT NEXT to the Majini. In that case, it is best to perform an instant kill melee from behind or shoot the Majini one more time to cause the Majini to fall. To me, this is the worst flaw of lag shot, simply because, if you had damaged the Majini normally, your character could kill the Majini after the stun, but because you are using lag shot, you need that extra gunshot, but can't get it, so... you are losing time by trying a lag shot when a Majini falls on its knees during a leg stun!
- Never aim toward the head when performing the actual lag shot gunshot or you run the risk of getting a critical shortly before the melee. This can be even worse and you might accidentally activate a scripted Cephalo shortly before a melee.
- Sometimes a Majini will stagger backwards from the lag shot if they are shot in the top half and the melee will miss. This happens VERY rarely, but it will happen eventually. Shooting a Majini in the leg instead of the body will sometimes cause them to fall and the melee will miss as well! It's best to aim toward the body.
- With Safari Chris, if you do a lag shot right after a head stun (lag shot + straight), the Majini might fall and roll to the ground and the straight will miss the rolling Majini. The melee can usually be saved through a stomp when this happens, but this can cause a missed combo!
Type B and D Lag Shot
Player: Berserker Kev
NOTE: Safari Chris is normally a head stun character when trying to melee kill with him. His usual melee kill combination is headshot + straight. When played with lag shot like in the video above, he can be played as a leg stun character since all leg stuns can give you a melee kill. Playing Safari Chris as a leg stun character with the help of lag shot reduces the chances for criticals and random Cephalos in stages where they are both common like Missile Area. I use control type B in the video up above.
The method to perform a lag shot with Type B and D is the easiest, so I will explain it first. With Type B and D, get a stun on an enemy then rush up to the enemy and aim then fire and perform the melee DIRECTLY after firing. The melee button must be pressed between the time period where the gun is fired and the bullet actually hits the enemy.
Here is a full explanation of how to perform a melee from a leg stun with Type B or D:
1) Stun an enemy by shooting the enemy in a leg to get a leg stun
2) Rush toward the stunned enemy to where the melee prompt appears while standing near it
3) Aim at a portion of the enemy with the L1/LT button
4) While aiming press the R1/RT button to fire then QUICKLY tap the Square/X button to perform the melee
The actual shot + melee combination has to be performed one tap right after the other. It's much like Tekken where two button taps must be pressed one right after the other very quickly! Sort of like... R1 ~ Square or RT ~ X.
Type A and C Lag Shot
Player: RAGIA-2-RAGI_
NOTE: The player in the video above is a Type A player. Type A lag shot looks no different from Type B lag shot, but, as you can see, he does it a lot less than in my video - aka. lag shot is harder with Type A and C controls.
Type A and C players have a similar method for lag shot, but, since the melee button and the fire button are both the same, the fire button must be held before stepping in front of the enemy and the gunshot must be triggered by aiming with the aim button. Basically, you have to keep in mind that after you hold the fire button then tap the R1/RT button while holding the fire button, your character will shoot!
Here is a full explanation of how to perform a melee from a leg stun with Type A or C:
1) Stun an enemy by shooting the enemy in a leg to get a leg stun
2) Hold down the fire button (Square/X) then rush toward the stunned enemy to where the melee prompt appears while standing near it
3) While the Square/X button is still being held, aim at a portion of the enemy with the right analog (tilt the camera toward the enemy). The MOMENT you press and hold the R1/RT button to aim your weapon, your character will fire.
4) Right after pressing the R1/RT button to fire, release the Square/X button then quickly tap the Square/X button once again to perform the melee
Just like with Type B and D controls, the melee button press must be tapped in between the time the gunshot is fired and when the gunshot actually hits the enemy in order to perform the melee.
NOTE: If you have any problems performing lag shot with either method, try playing in duo and allowing another player to host - play off host. While playing off host, you will get a bit of lag depending on the connection and the lag shot will be much easier to pull off since you will not need to press the fire and melee button as quickly in sequence.
Labels:
FAQ,
guide,
RE5,
Resident Evil 5,
The Mercenaries,
walkthrough
Wednesday, March 28, 2012
Resident Evil 5: The Mercenaries - Scoring System
The following tables list all point amounts for Resident Evil 5: The Mercenaries. The only point amount not in a table is the point amount for leftover time. Each leftover second at the end of a run is worth 1000 points in The Mercenaries (1 second = 1000 points).
RE5 Mercenaries Normal Enemy Point Amounts
RE5 Mercenaries Boss Enemy Point Amounts
The tables above show the point amount per normal enemy and boss enemy in Resident Evil 5 Mercenaries. Once an enemy is killed, the full point amount that the enemy is worth will be received the moment that all of its HP total has been consumed - some enemies (such as the Blue Chainsaw Majini) do not even have to be performing a death animation for the player to receive the points for their kill. Keep in mind that the Blue Chainsaw Majini is not truly defeated until all of his HP is taken while he is in his berserk mode state.
RE5 Mercenaries Combo System (Standard Combo)
The table above shows the standard combo system for Resident Evil 5: The Mercenaries. Starting from kill 2, a player will receive bonus points per enemy that is killed so long as the combo chain is kept going through enemy kills. The current combo will appear on the right hand side of the screen. Each kill must be chained within 10 seconds of the next in order to continue the combo chain. Normal enemies and boss enemies both give a player a specific amount of bonus points depending on the current kills that have been chained.
The bonus received from chaining kills gives a player a fixed rate of 1000 points per normal enemy and 7000 points per boss enemy starting at 50 combo all the way until 150 combo. The bonus points for the combo are not added up until the combo is broken or until the run ends at 150 combo.
RE5 Mercenaries Combo System (with Combo Chests included)
This second table deals with the bonus received once a combo chest is activated. It needs to be explained thoroughly to understand it, so let's start with kill 2 and explain it:
As you can see, the bonus received is much higher between kills 2-9. Kills 2-9 are the most vital kills for activating a combo chest. Kills after 10, up to 19, award a fixed rate of 500 points per kill. Kills 20-29 give 400 points. From 30 kills to 39 kills, the combo chests are only giving a fixed rate of 300 bonus points extra per kill, so a player might start to question if they are really needed by then. At 40 kills up to 49 kills a player is only receiving 150 bonus points, which is practically worthless. After 50 kills, combo chests become absolutely pointless since you are already receiving 1000 bonus points per enemy kill.
Obviously, ALL of these points can add up, but after 30 combo, if you have enemies to kill in the area, taking the time to grab a combo chest is not really in your best interest. Think about it, you could have quickly killed the enemies in the area faster to get more enemies to spawn and have a higher time instead of running to the nearest combo chest and allowing the current enemies to stay in the stage longer, reducing time, for a measly 300 points extra per kill. That doesn't sound good when each leftover second is worth 1000 points and you could have possibly finished the stage faster with not grabbing the combo chest after 30 kills.
Long story short, after 30 combo, only grab a combo bonus from a combo chest if there are no nearby enemies in the area to kill. Don't go running toward a chest at 30 combo while a crowd of 5 enemies follow behind and wait for your character to grab the combo bonus - in the end, you're losing by doing stuff such as this.
Overall, how you collect combo chests, is all based on your opinion really since Mercs runs can be so random. The current enemy spawns on the screen are the main deciding factor after 30 combo. Just... don't grab a combo bonus after 50 combo - there is no point to that.
-----
RE5 Mercenaries Normal Enemy Point Amounts
| Enemy Type | Point Amount |
| Majini (Town) | 300 |
| Majini (Wetland) | 400 |
| Majini (Base) | 400 |
| Bui Kichwa | 400 |
| Kipepeo | 700 |
| Cephalo | 800 |
| Licker Beta | 900 |
| Duvalia | 900 |
| Big Man Majini | 1000 |
| Chicken | 2000 |
RE5 Mercenaries Boss Enemy Point Amounts
| Enemy Type | Point Amount |
| Executioner Majini | 5000 |
| Giant Majini | 5000 |
| Reaper | 6000 |
| Chainsaw Majini (Red and Blue) | 7000 |
| Gatling Gun Majini | 10000 |
| Executioner Majini (Red) | 15000 |
The tables above show the point amount per normal enemy and boss enemy in Resident Evil 5 Mercenaries. Once an enemy is killed, the full point amount that the enemy is worth will be received the moment that all of its HP total has been consumed - some enemies (such as the Blue Chainsaw Majini) do not even have to be performing a death animation for the player to receive the points for their kill. Keep in mind that the Blue Chainsaw Majini is not truly defeated until all of his HP is taken while he is in his berserk mode state.
-----
RE5 Mercenaries Combo System (Standard Combo)
| Kills | Normal Bonus | Boss Bonus |
| 02 | +20 | +500 |
| 03 | +50 | +1000 |
| 04 | +100 | +1500 |
| 05 | +200 | +2000 |
| 06 | +250 | +2500 |
| 07 | +300 | +3000 |
| 08 | +350 | +3500 |
| 09 | +400 | +4000 |
| 10 - 19 | +500 | +4500 |
| 20 - 29 | +600 | +5000 |
| 30 - 39 | +700 | +5500 |
| 40 - 49 | +850 | +6000 |
| 50+ | +1000 | +7000 |
The table above shows the standard combo system for Resident Evil 5: The Mercenaries. Starting from kill 2, a player will receive bonus points per enemy that is killed so long as the combo chain is kept going through enemy kills. The current combo will appear on the right hand side of the screen. Each kill must be chained within 10 seconds of the next in order to continue the combo chain. Normal enemies and boss enemies both give a player a specific amount of bonus points depending on the current kills that have been chained.
The bonus received from chaining kills gives a player a fixed rate of 1000 points per normal enemy and 7000 points per boss enemy starting at 50 combo all the way until 150 combo. The bonus points for the combo are not added up until the combo is broken or until the run ends at 150 combo.
-----
RE5 Mercenaries Combo System (with Combo Chests included)
| Kills | Normal Bonus | Bonus w/Combo Chest | Actual Bonus received |
| 02 | +20 | +1000 | +980 |
| 03 | +50 | +1000 | +950 |
| 04 | +100 | +1000 | +900 |
| 05 | +200 | +1000 | +800 |
| 06 | +250 | +1000 | +750 |
| 07 | +300 | +1000 | +700 |
| 08 | +350 | +1000 | +650 |
| 09 | +400 | +1000 | +600 |
| 10 - 19 | +500 | +1000 | +500 |
| 20 - 29 | +600 | +1000 | +400 |
| 30 - 39 | +700 | +1000 | +300 |
| 40 - 49 | +850 | +1000 | +150 |
| 50+ | +1000 | +1000 | +0 |
This second table deals with the bonus received once a combo chest is activated. It needs to be explained thoroughly to understand it, so let's start with kill 2 and explain it:
Starting at kill 2, a player normally receives a bonus of 20 points. When a combo chest is activated, starting at kill 2, a player receives 1000 points in place of the 20 points that would be given for kill 2. So, a player is actually receiving 980 points extra by activating the combo chest at kill 2 (1000 points - 20 points = 980 points).
As you can see, the bonus received is much higher between kills 2-9. Kills 2-9 are the most vital kills for activating a combo chest. Kills after 10, up to 19, award a fixed rate of 500 points per kill. Kills 20-29 give 400 points. From 30 kills to 39 kills, the combo chests are only giving a fixed rate of 300 bonus points extra per kill, so a player might start to question if they are really needed by then. At 40 kills up to 49 kills a player is only receiving 150 bonus points, which is practically worthless. After 50 kills, combo chests become absolutely pointless since you are already receiving 1000 bonus points per enemy kill.
Obviously, ALL of these points can add up, but after 30 combo, if you have enemies to kill in the area, taking the time to grab a combo chest is not really in your best interest. Think about it, you could have quickly killed the enemies in the area faster to get more enemies to spawn and have a higher time instead of running to the nearest combo chest and allowing the current enemies to stay in the stage longer, reducing time, for a measly 300 points extra per kill. That doesn't sound good when each leftover second is worth 1000 points and you could have possibly finished the stage faster with not grabbing the combo chest after 30 kills.
Long story short, after 30 combo, only grab a combo bonus from a combo chest if there are no nearby enemies in the area to kill. Don't go running toward a chest at 30 combo while a crowd of 5 enemies follow behind and wait for your character to grab the combo bonus - in the end, you're losing by doing stuff such as this.
Overall, how you collect combo chests, is all based on your opinion really since Mercs runs can be so random. The current enemy spawns on the screen are the main deciding factor after 30 combo. Just... don't grab a combo bonus after 50 combo - there is no point to that.
Labels:
FAQ,
guide,
RE5,
Resident Evil 5,
The Mercenaries,
walkthrough
Subscribe to:
Posts (Atom)